 binledger.
How to use
Daily warehouse work, one clear flow at a time. Open a process for screenshots, tips and exceptions.
The physical check
- Scan item
- Confirm location
- Verify item again
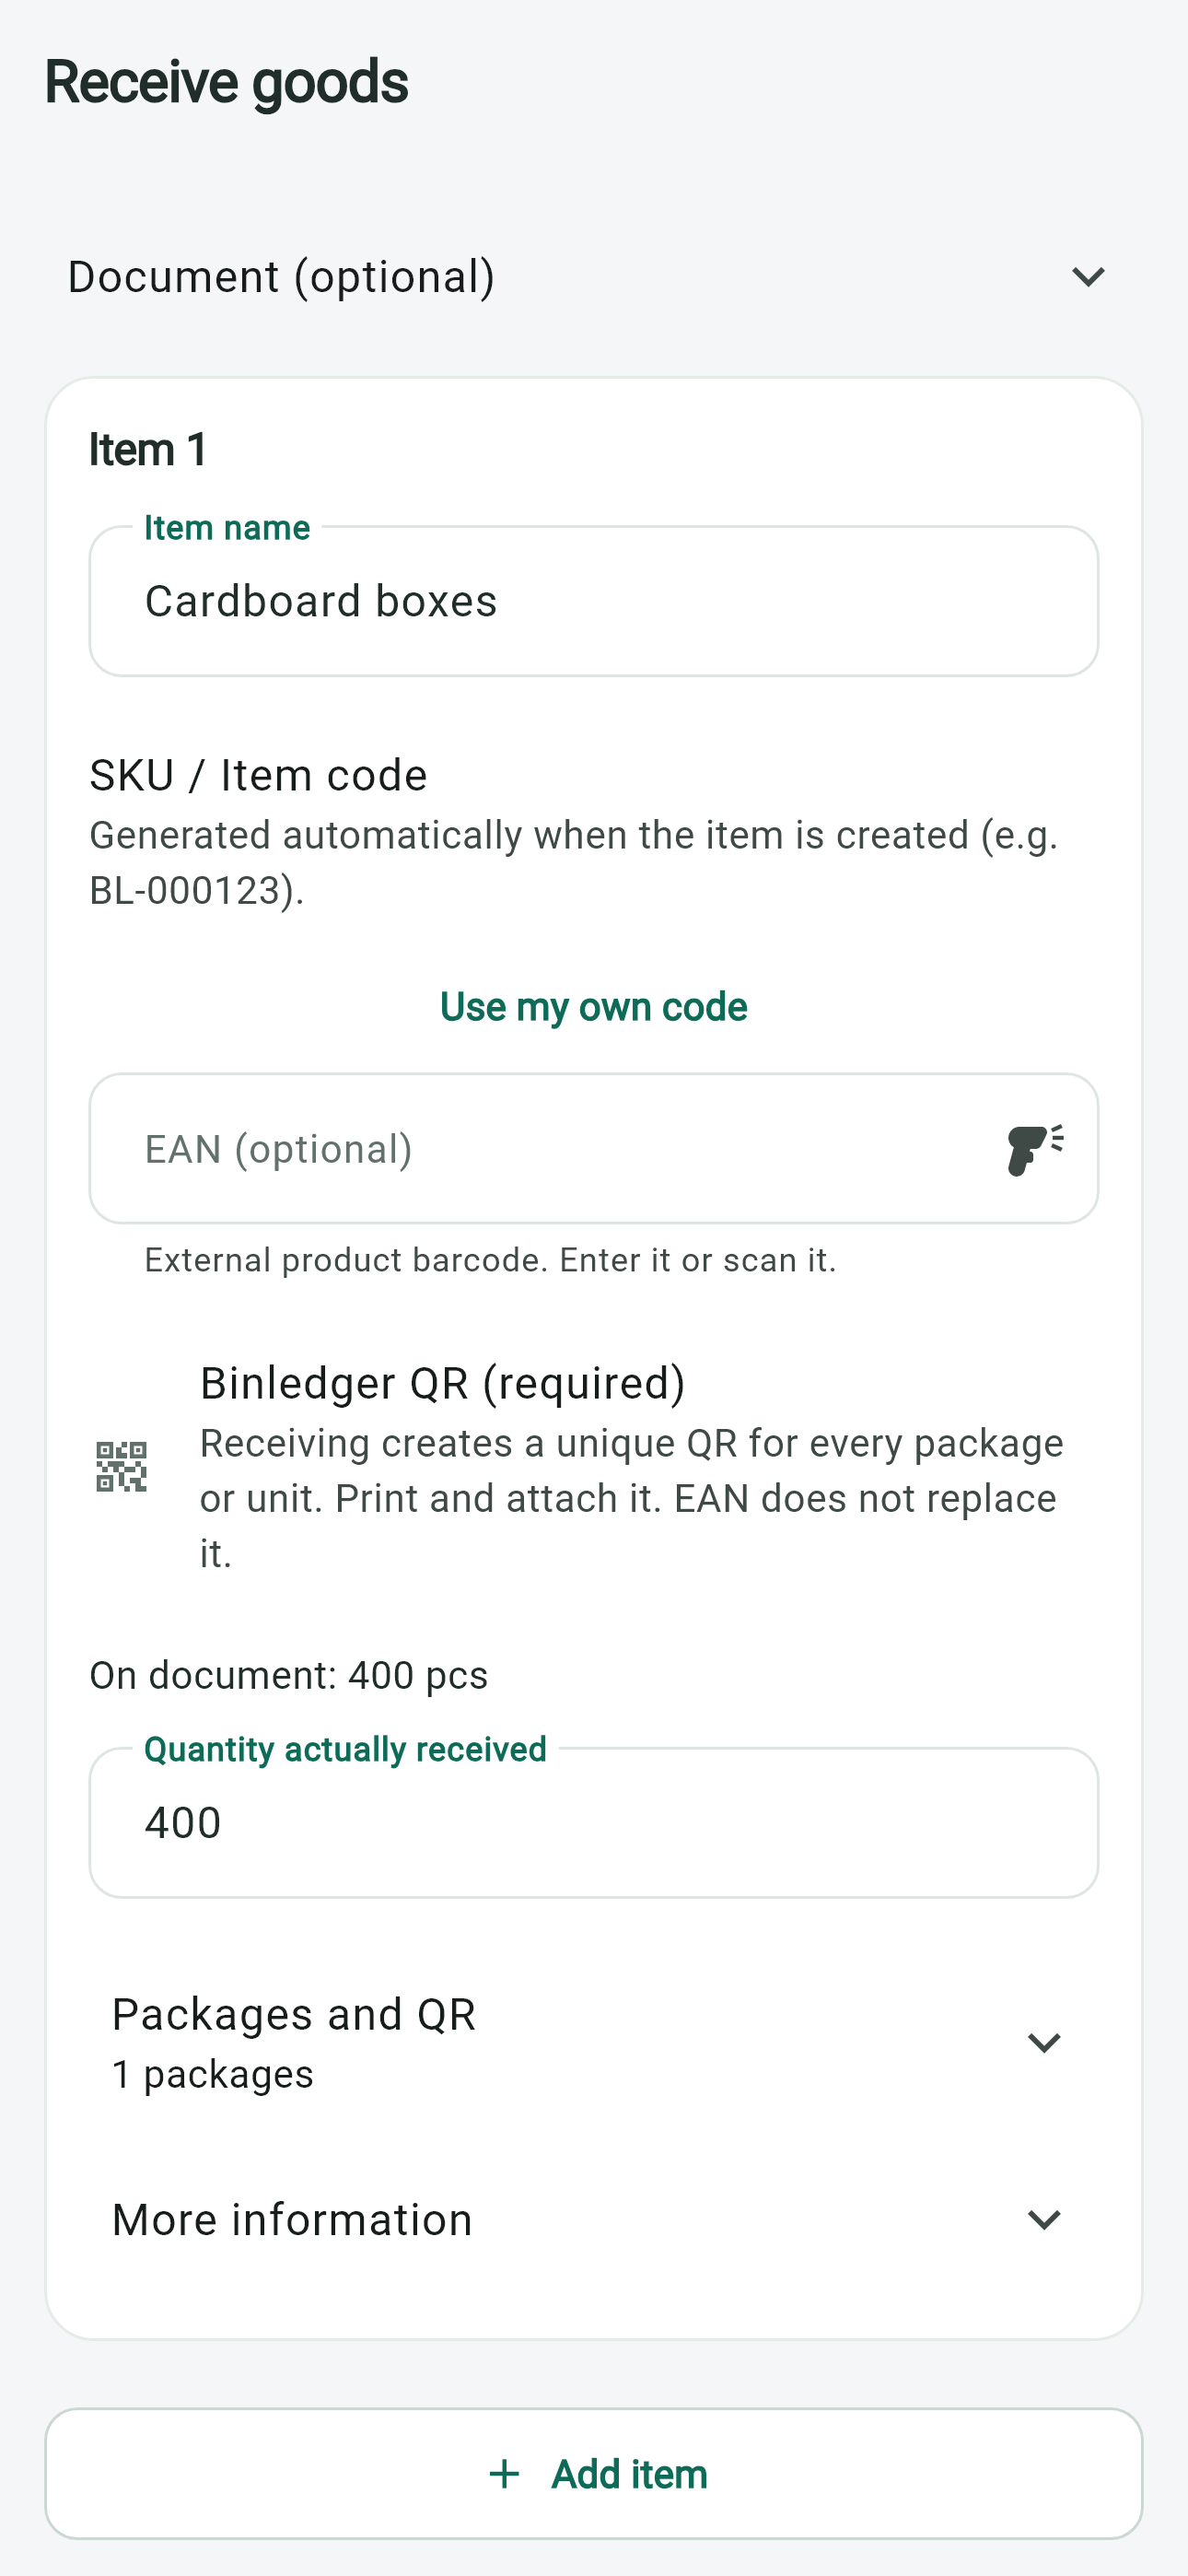
01Receive goodsRecord what actually arrived.Add items → Check quantities → Post receipt
Document import
Import an invoice or delivery note, then review the suggested lines before posting.
Manual receiving
Start without a document, select or create the item and enter the actual quantity.
QR printing
After posting, print the required labels for separately tracked packages.
EAN linking
A known EAN selects the product. Assign and confirm an unknown EAN to the right product.
Quantity check
Count what arrived; do not copy the document quantity without checking.
Discrepancy during receiving
Record missing, extra or damaged goods and keep the actual received quantity accurate.
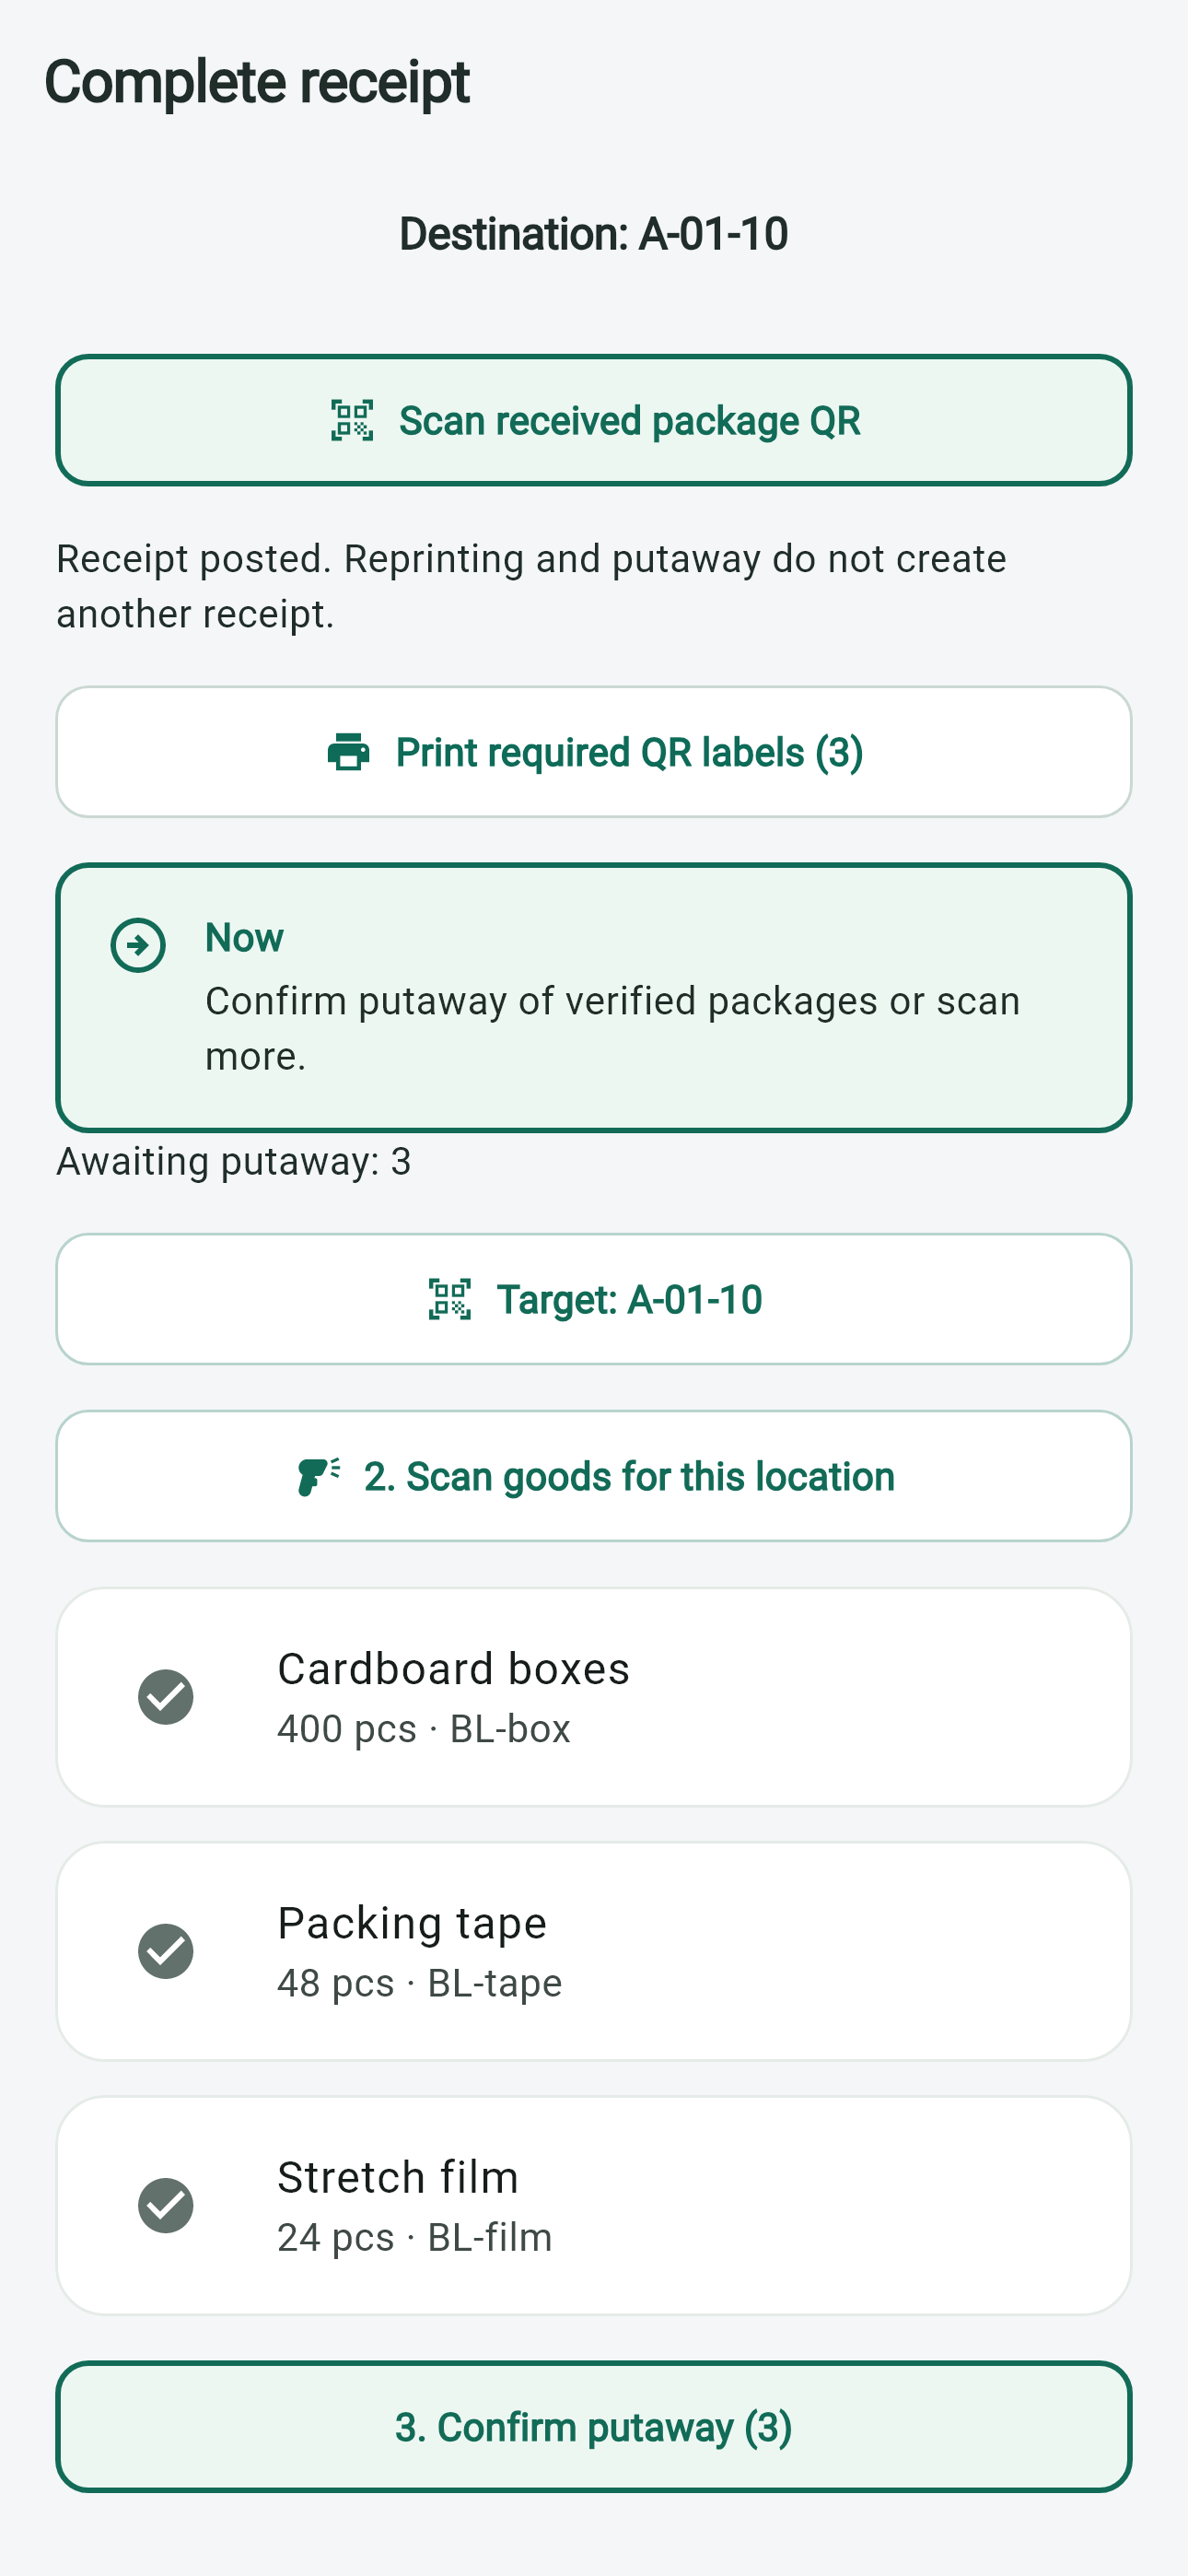
02PutawayMatch the physical goods to their storage location.Scan package/item → Scan location → Verify package/item again → Confirm putaway
Item has no QR
Print a QR for the tracked package before putting it away.
Reprint QR
Reprint the existing package label; reprinting does not create another receipt or add stock.
Optional EAN
EAN can identify a product in location-based tracking; use the package QR for a separately tracked package.
Multiple locations
Put away part of the quantity at each location. Verify each destination; the remainder stays pending.
Wrong scan
Check the requested item and location, then scan the correct code before confirming.
Discrepancy
Report a physical mismatch instead of confirming goods you cannot verify.
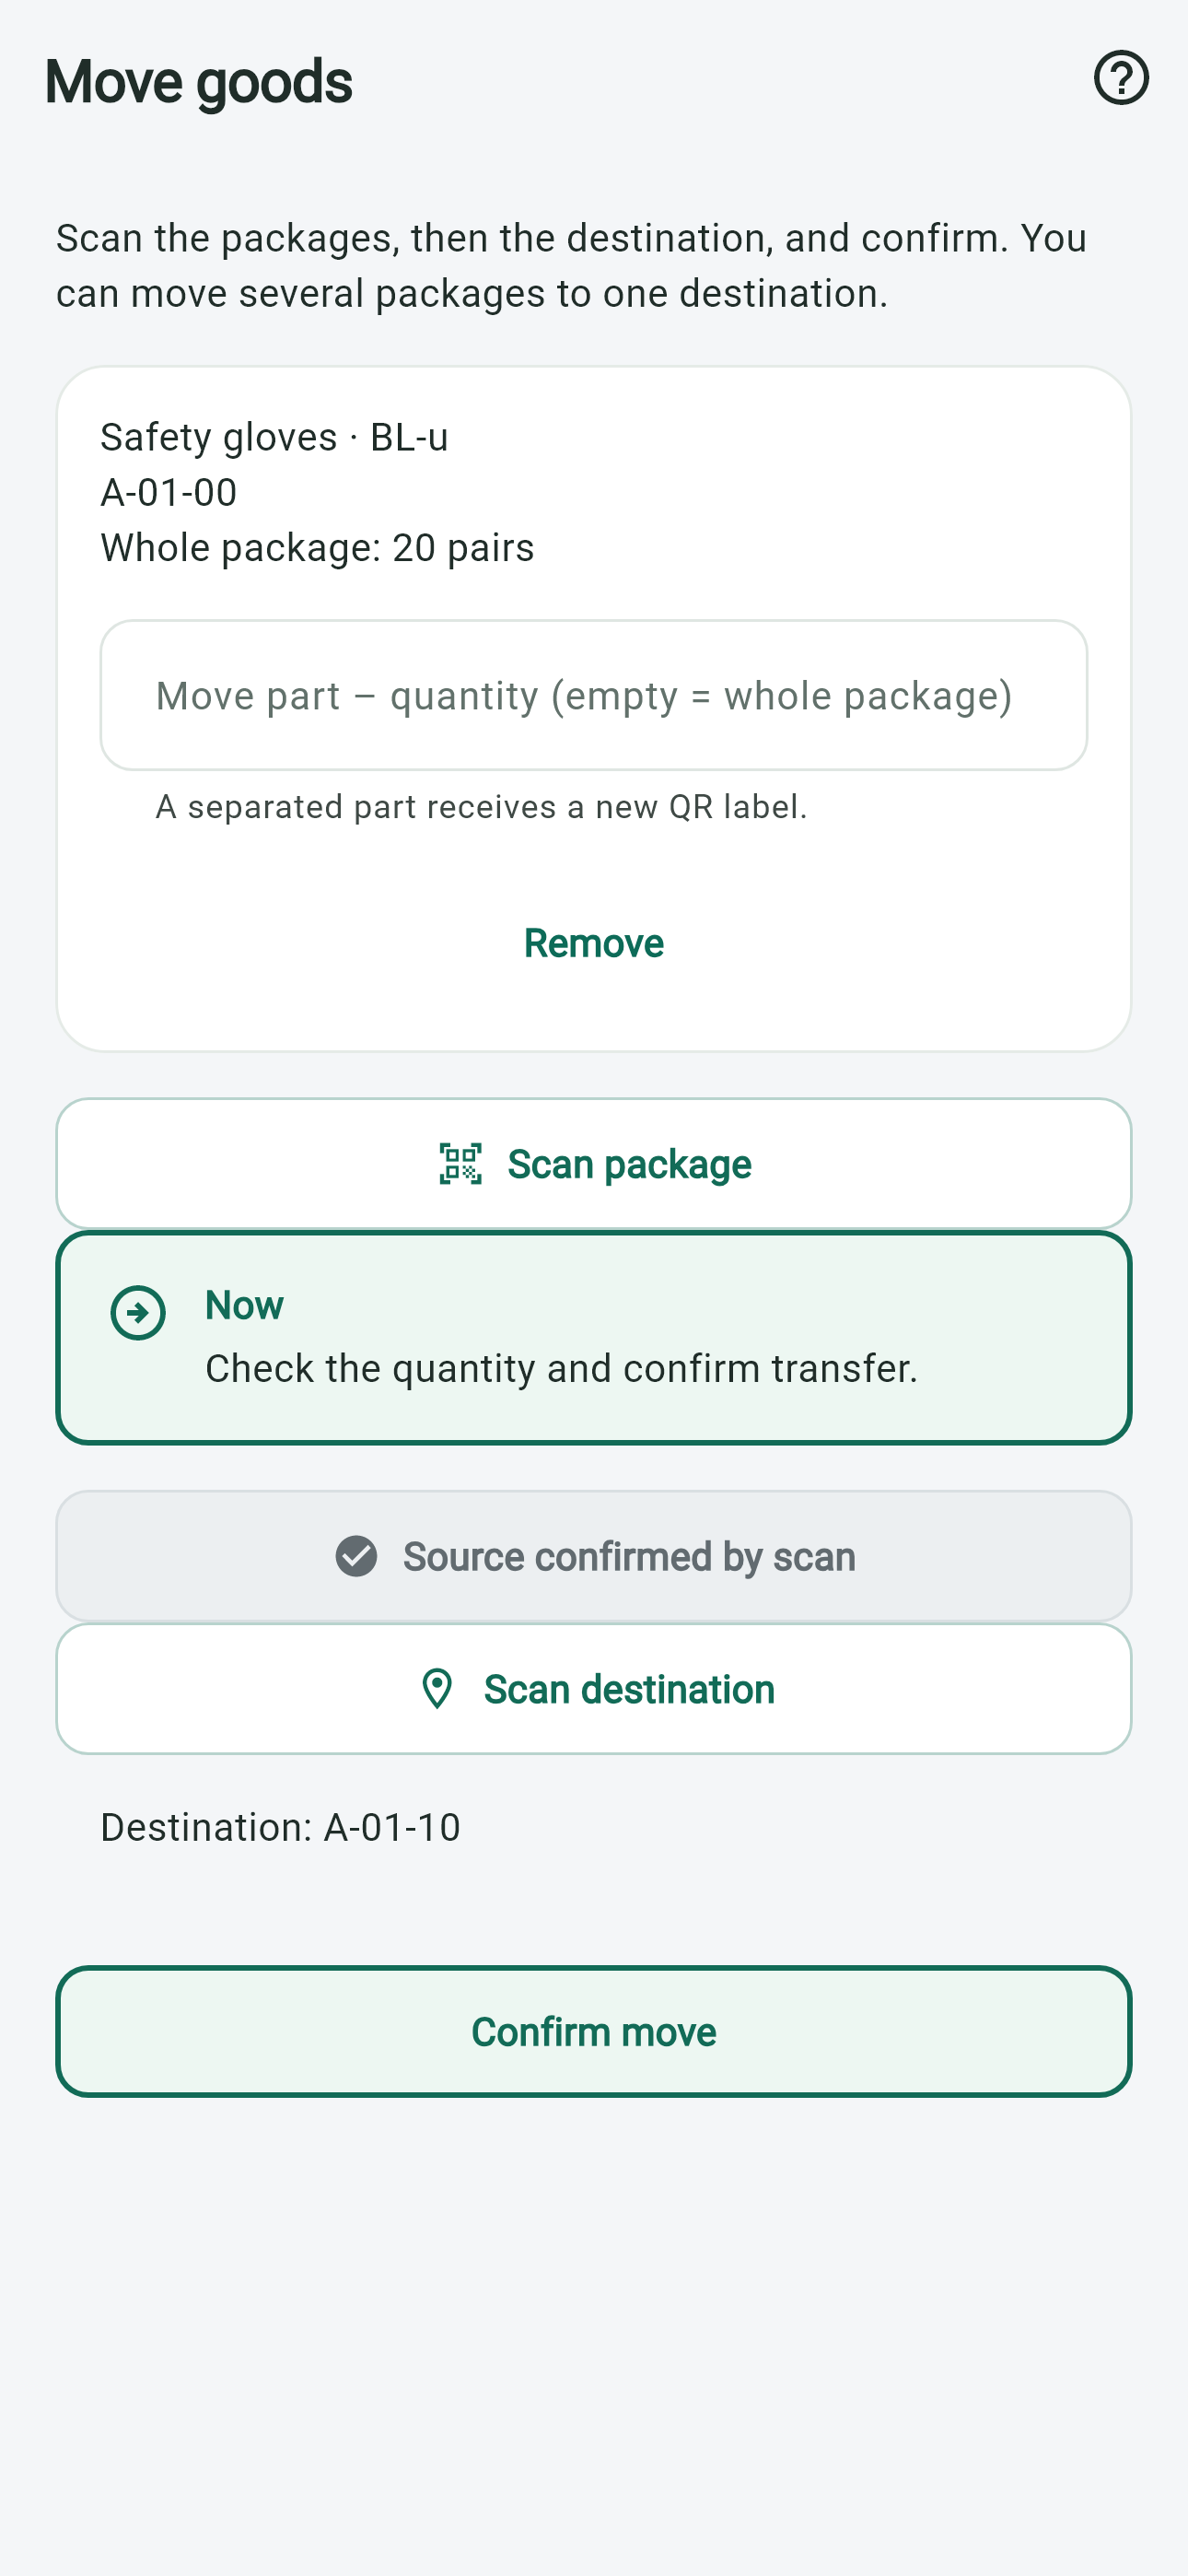
03Transfer / MoveKeep the source, destination and moved quantity clear.Select/scan item → Verify source → Scan destination → Verify item → Confirm
Whole package
Keep the package identity and verify the destination before confirming.
Split package
Enter the part being moved. The separated part receives a new QR label.
Cancelled label printing
Check the movement status before retrying. Reprint a missing label for the existing package rather than repeating a completed move.
Wrong location
Stop and scan the intended destination; confirm only after the physical location matches.
Quantity change
Check the quantity to move and the remainder before confirming. Report any unexplained difference.
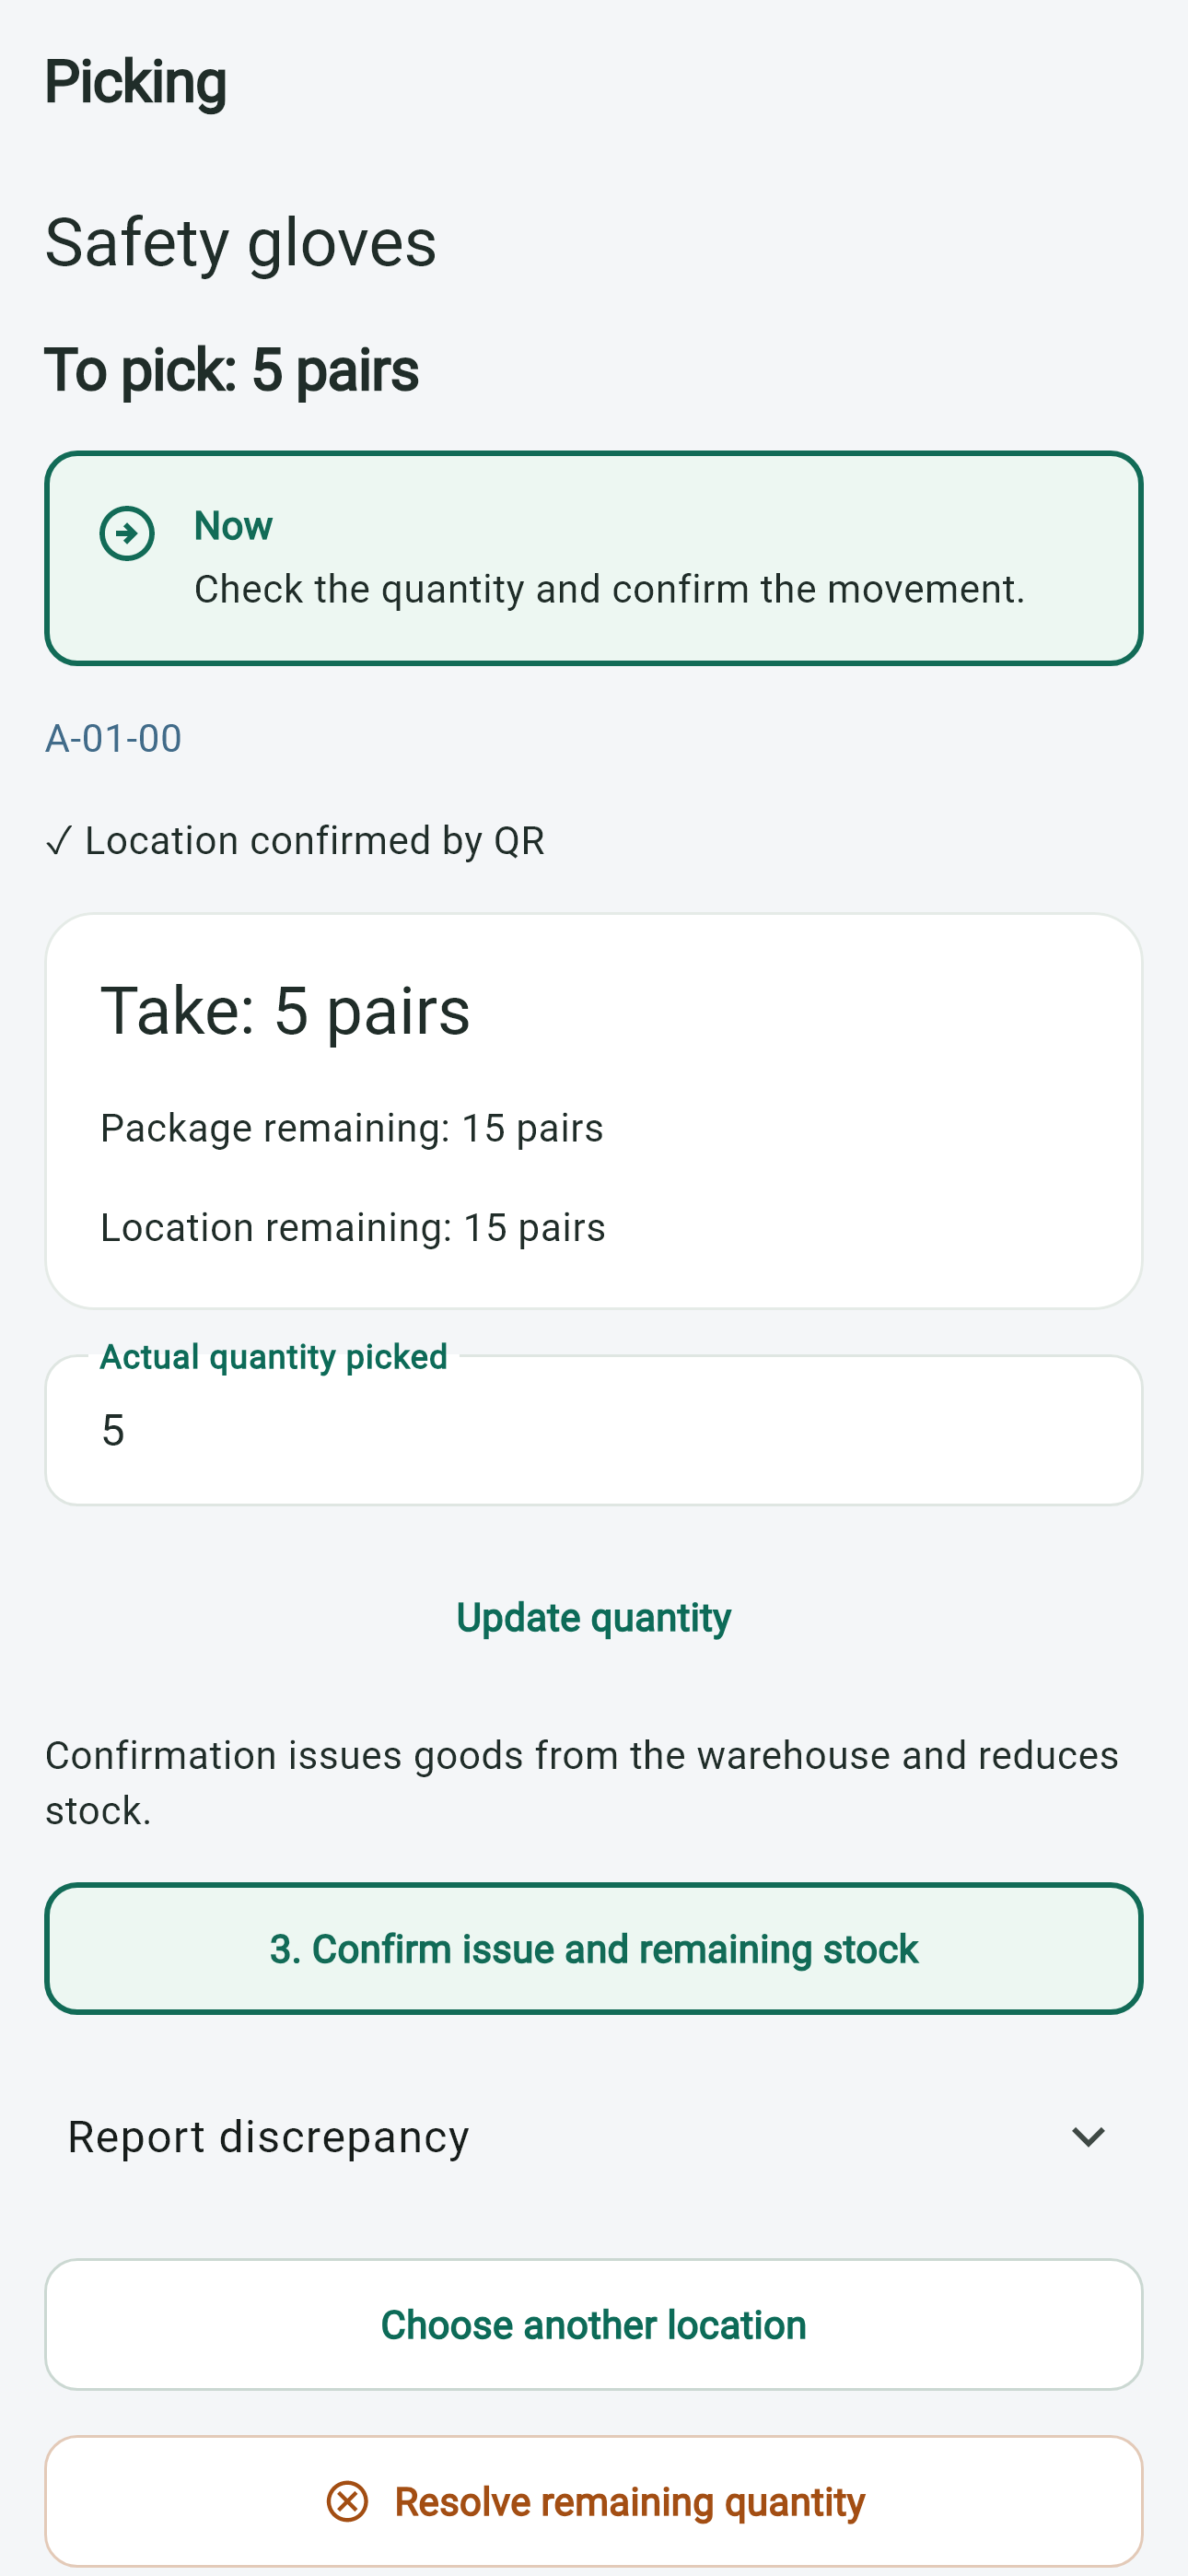
04Request / Picking / IssueVerify the location and goods, then issue the actual quantity.Open request → Go to location → Scan location → Scan item → Confirm quantity → Issue
Blocked request
Read the block reason and resolve the prerequisite, or ask your warehouse admin.
Partial quantity
Confirm only what you actually picked and review the remaining request quantity.
Staging
If your workflow uses a staging location, keep the goods identified there until the final issue.
Issue / outbound
Check the final quantity. Confirming issue reduces warehouse stock.
05Inventory / StocktakingRecord the physical count. Missing goods can create a discrepancy; do not force a fake count.Choose item/location → Count → Confirm → Review differences
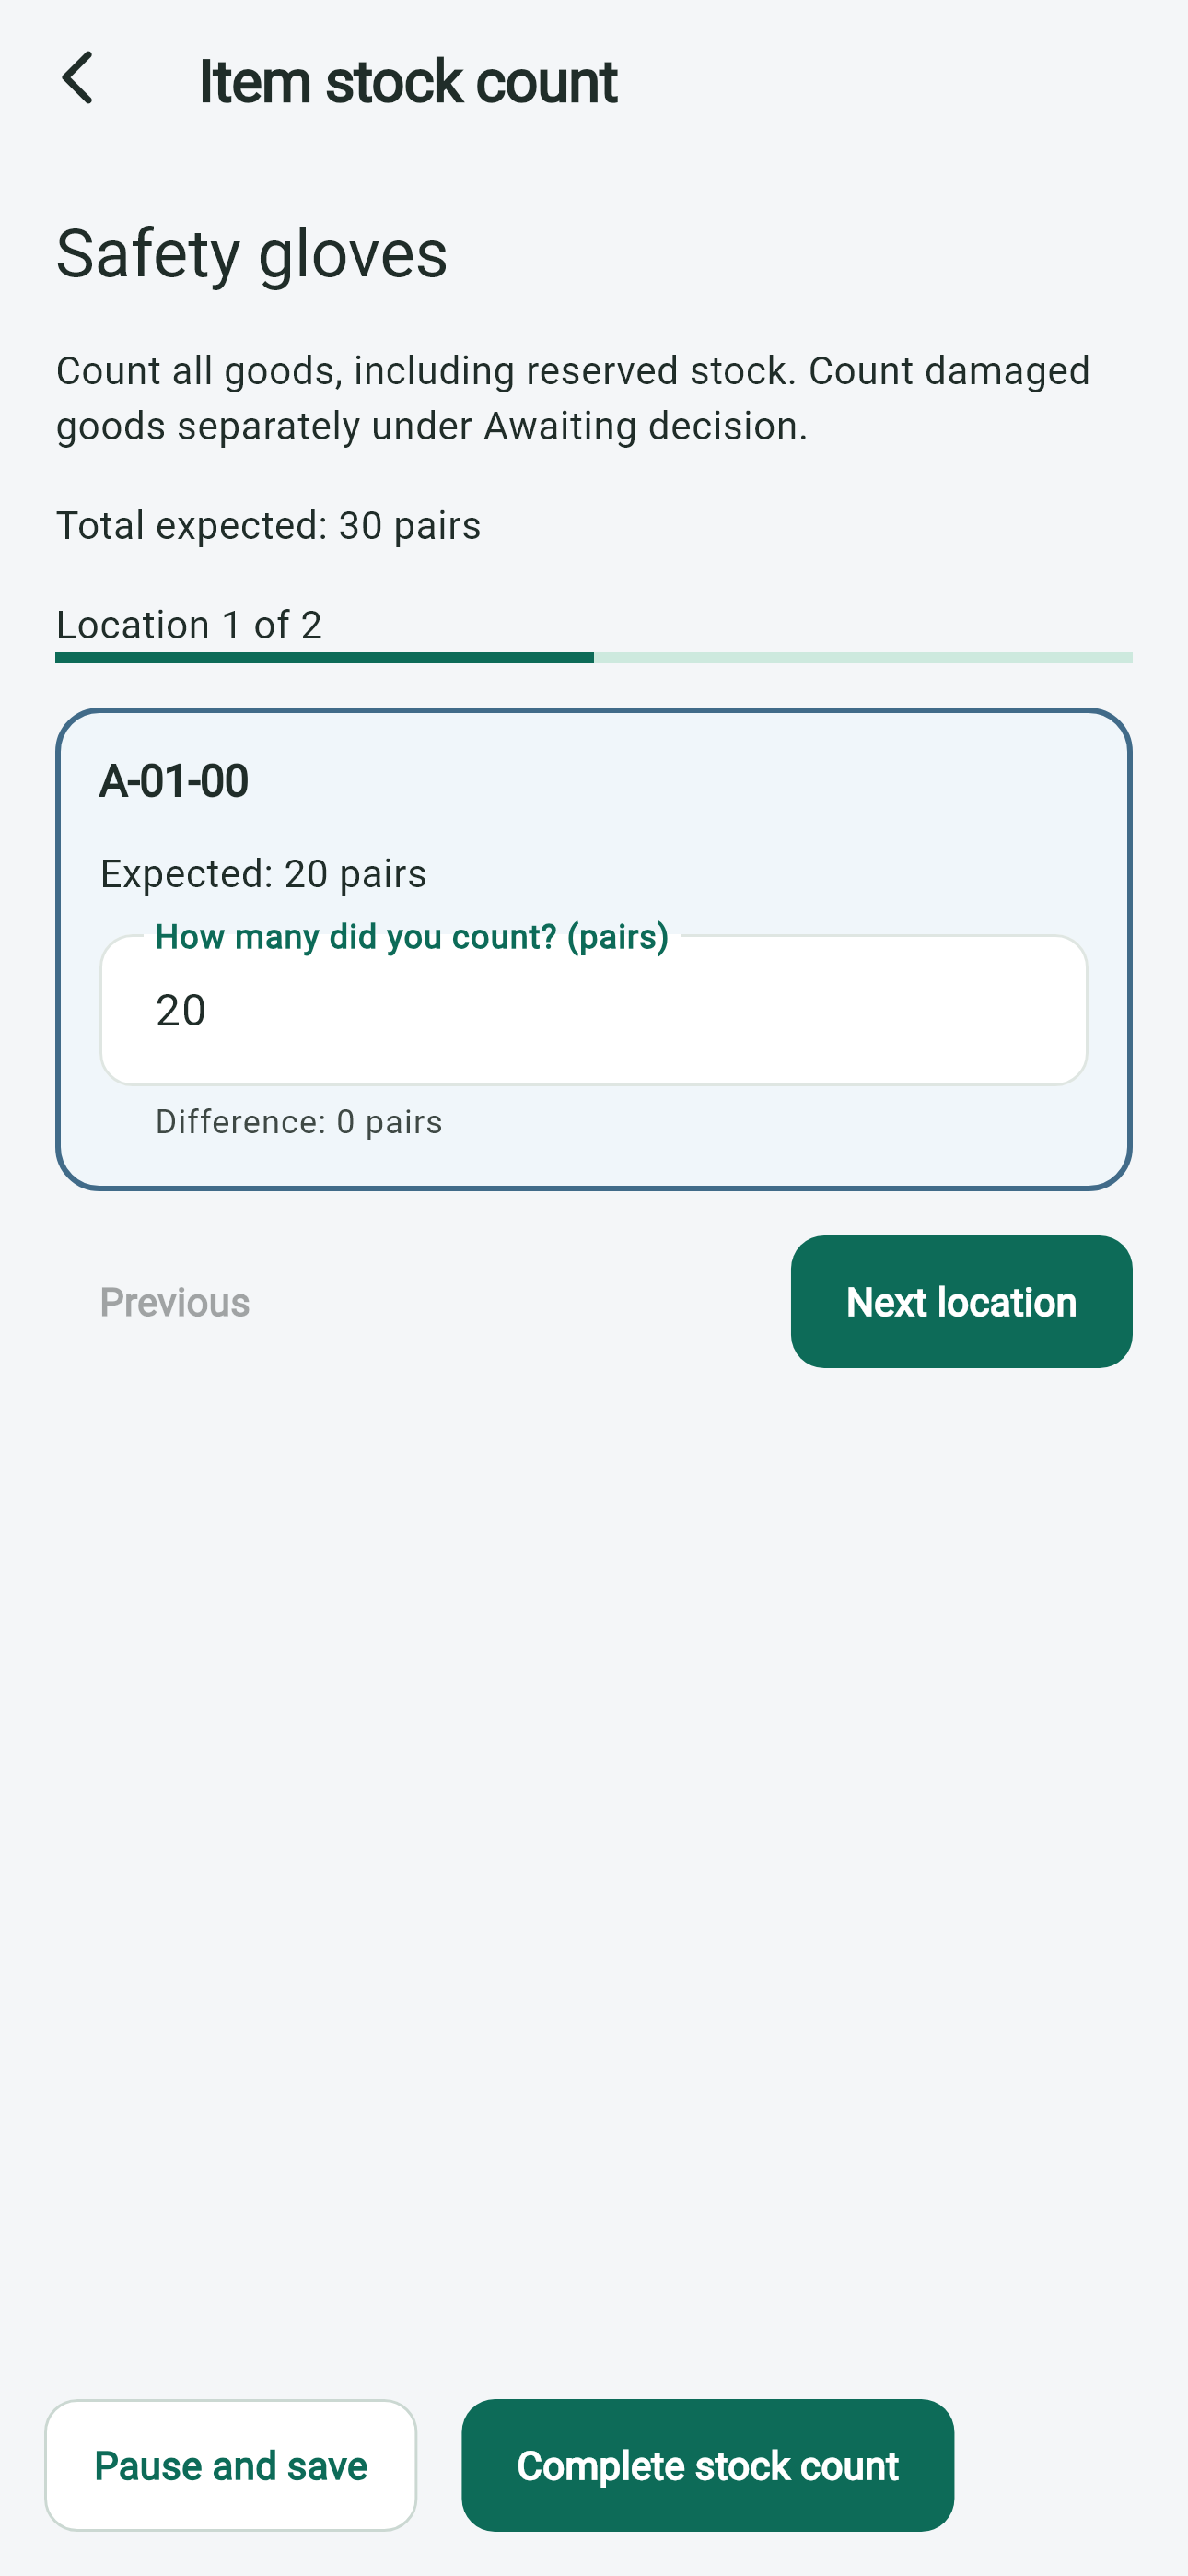
Item inventory
Count the item across its locations, including goods still in receiving.
Location stocktake
Check the goods physically present at the selected location.
Receiving inventory
Include goods waiting for putaway so they are not overlooked.
Discrepancies
Record differences and send them for review where required.
06Damaged goodsReport the damage and keep the affected stock identifiable during review.Report damaged goods → Hold / review → Final decision
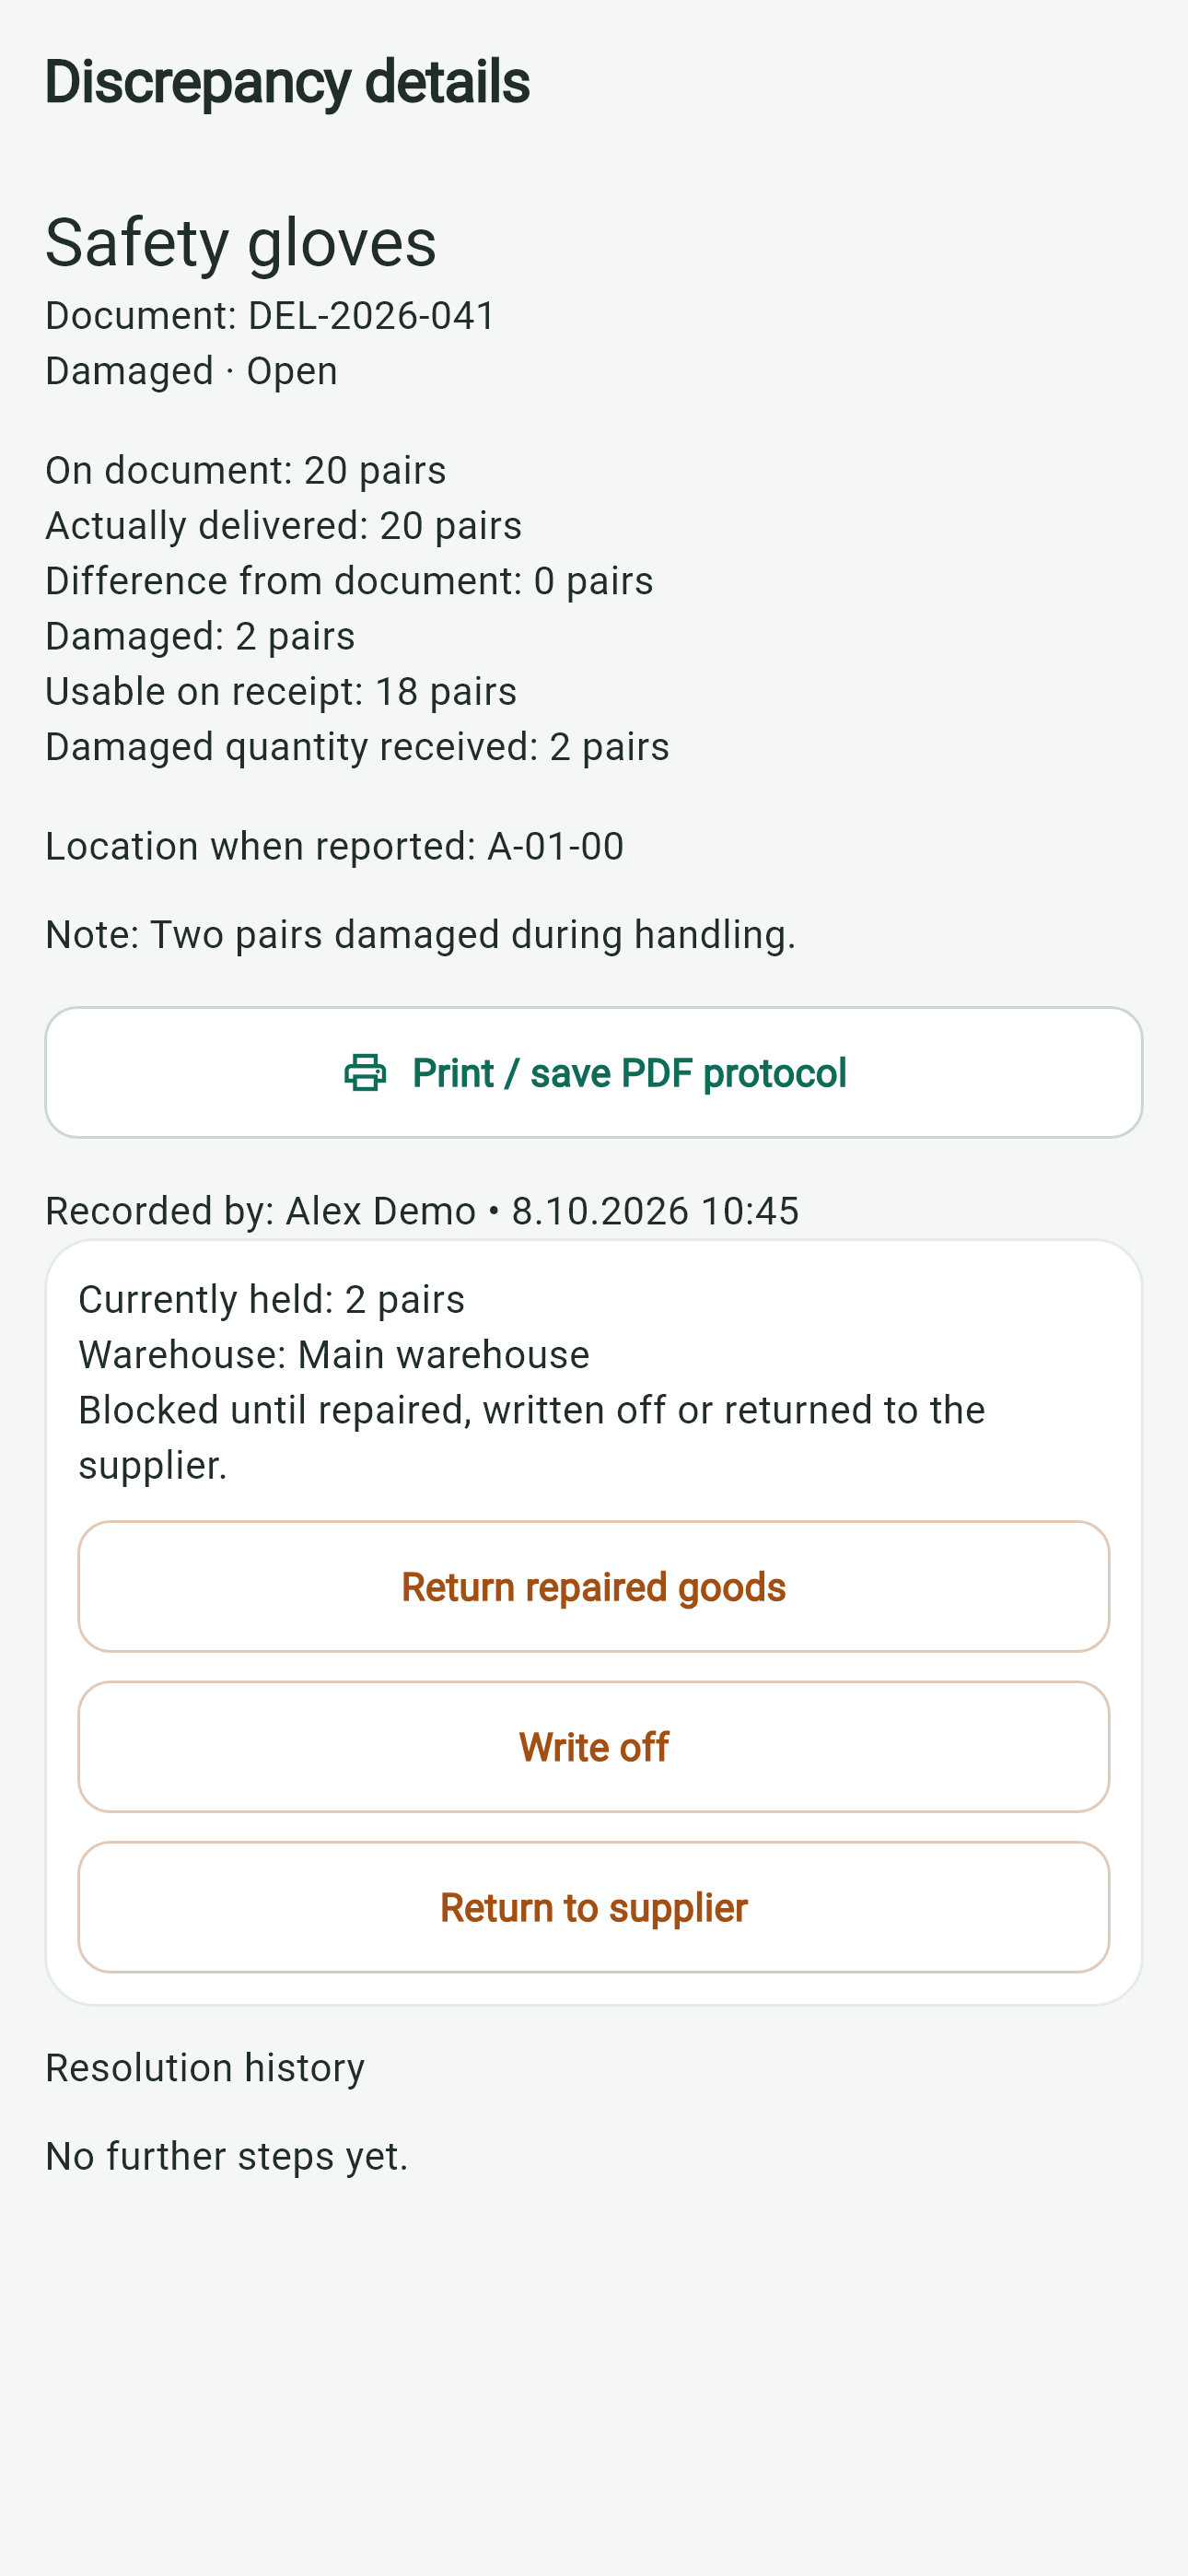
Business options
Release, dispatch or return may each be valid, depending on the goods and your company’s decision. Follow the authorised resolution; there is no universal choice.
07DiscrepanciesRecord missing, extra or damaged stock and quantity mismatches so they can be resolved.Record difference → Review → Resolve
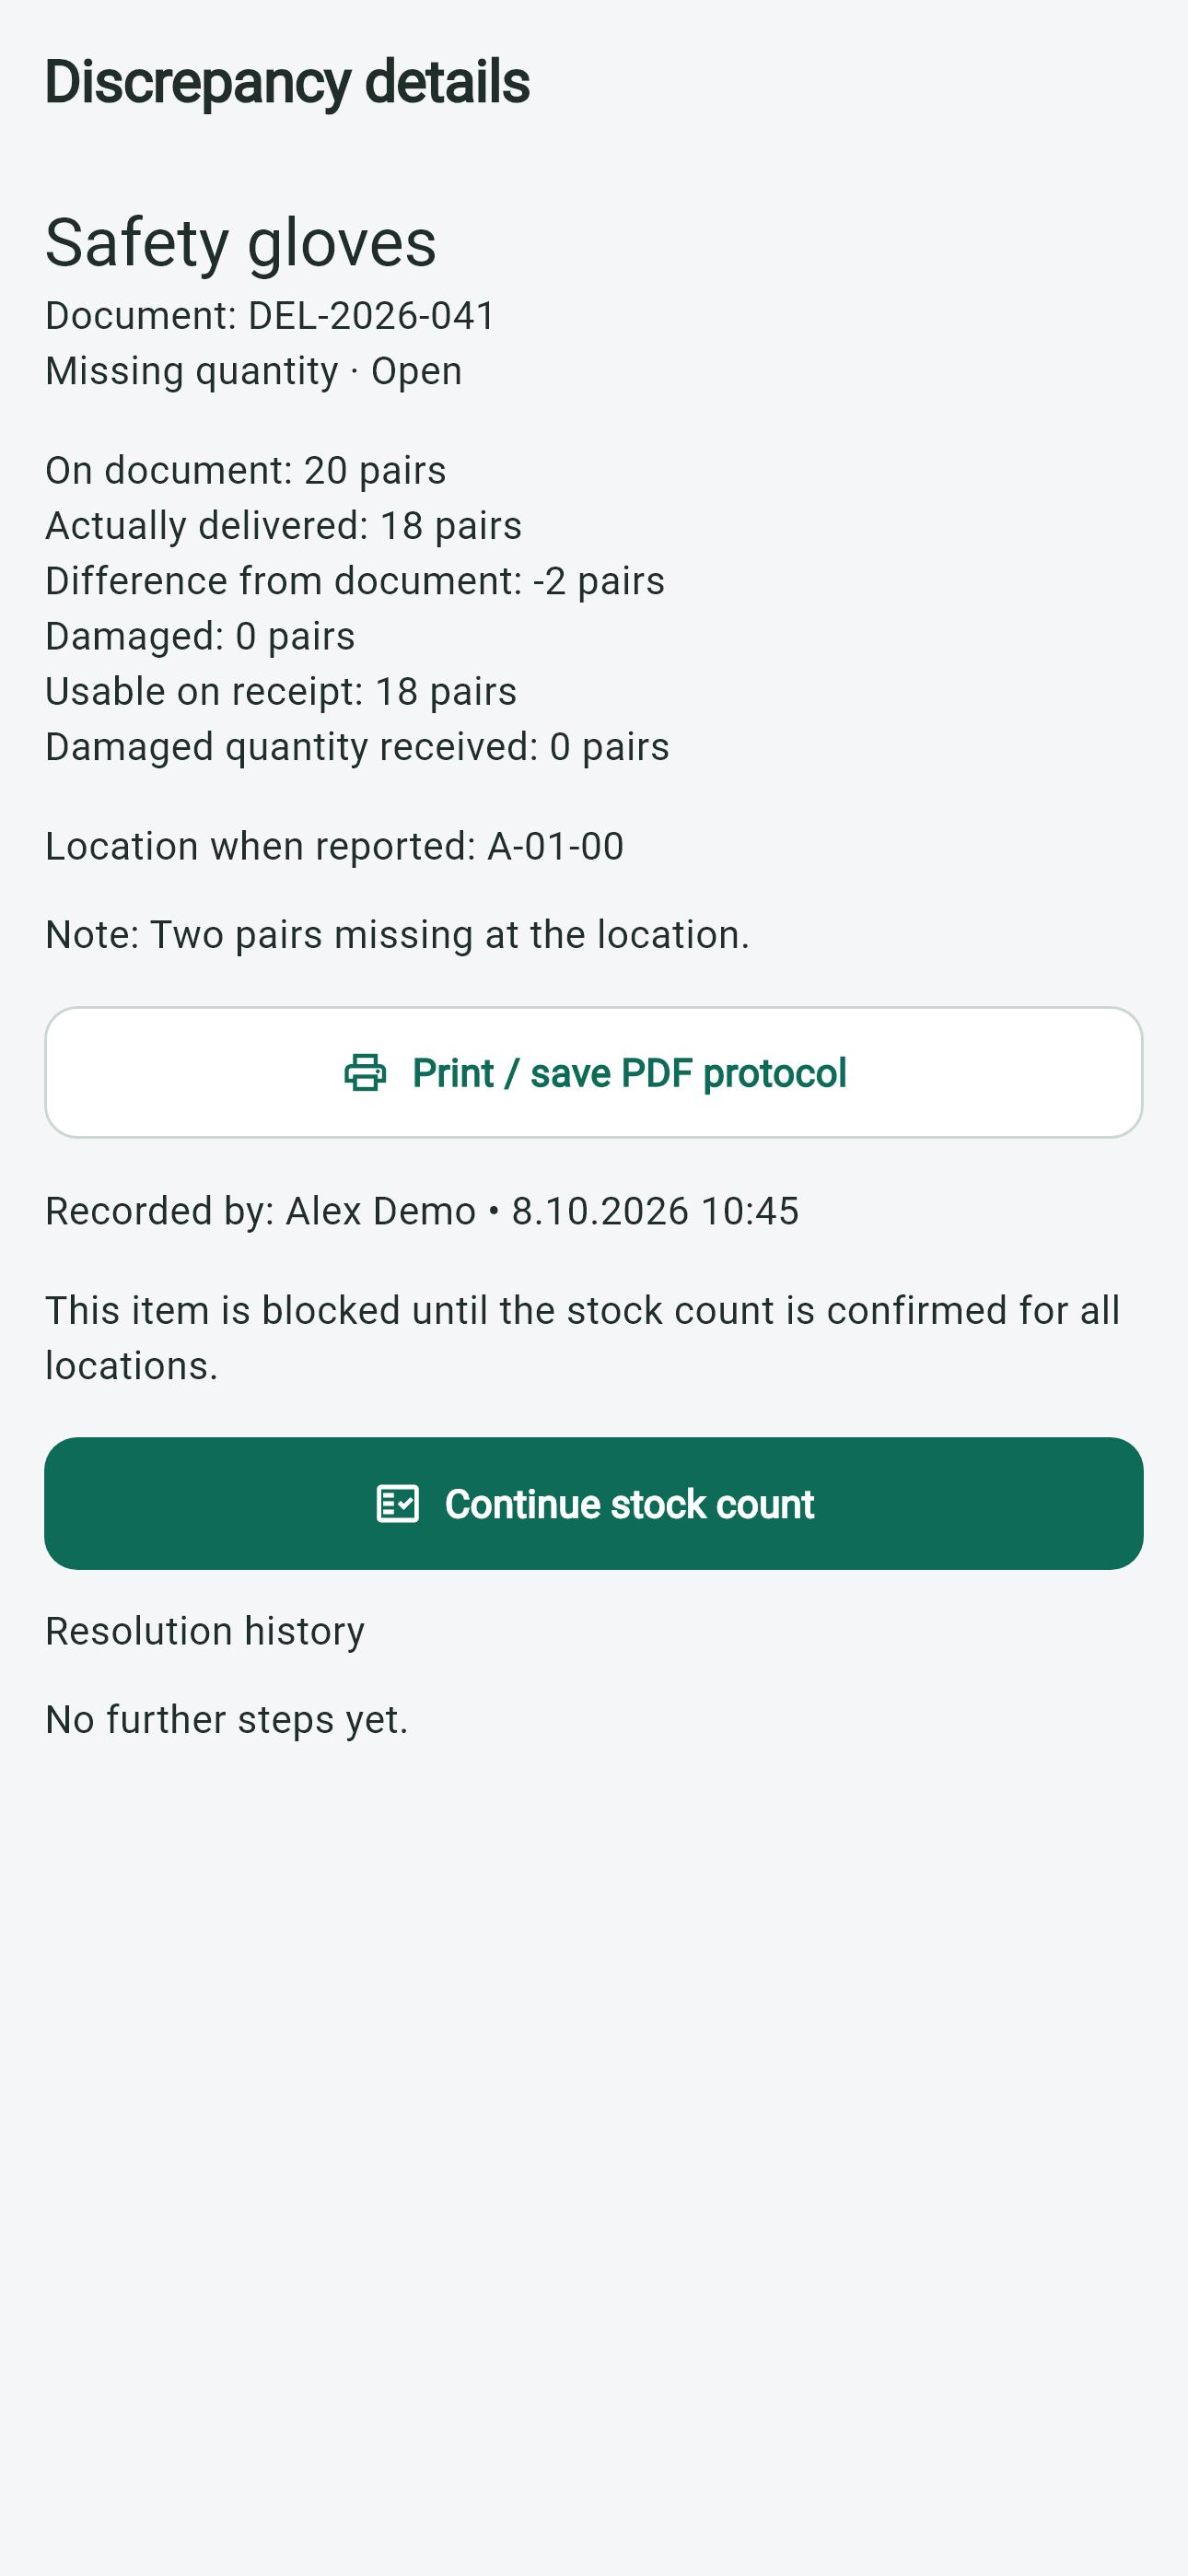
What to record
Identify the item, location and actual quantity, and briefly describe the difference.
Manager review
Where approval is required, leave the case for the authorised manager to review and resolve.
08History / audit trailMovements and changes remain visible in history.Open history → Find movement → Review changes
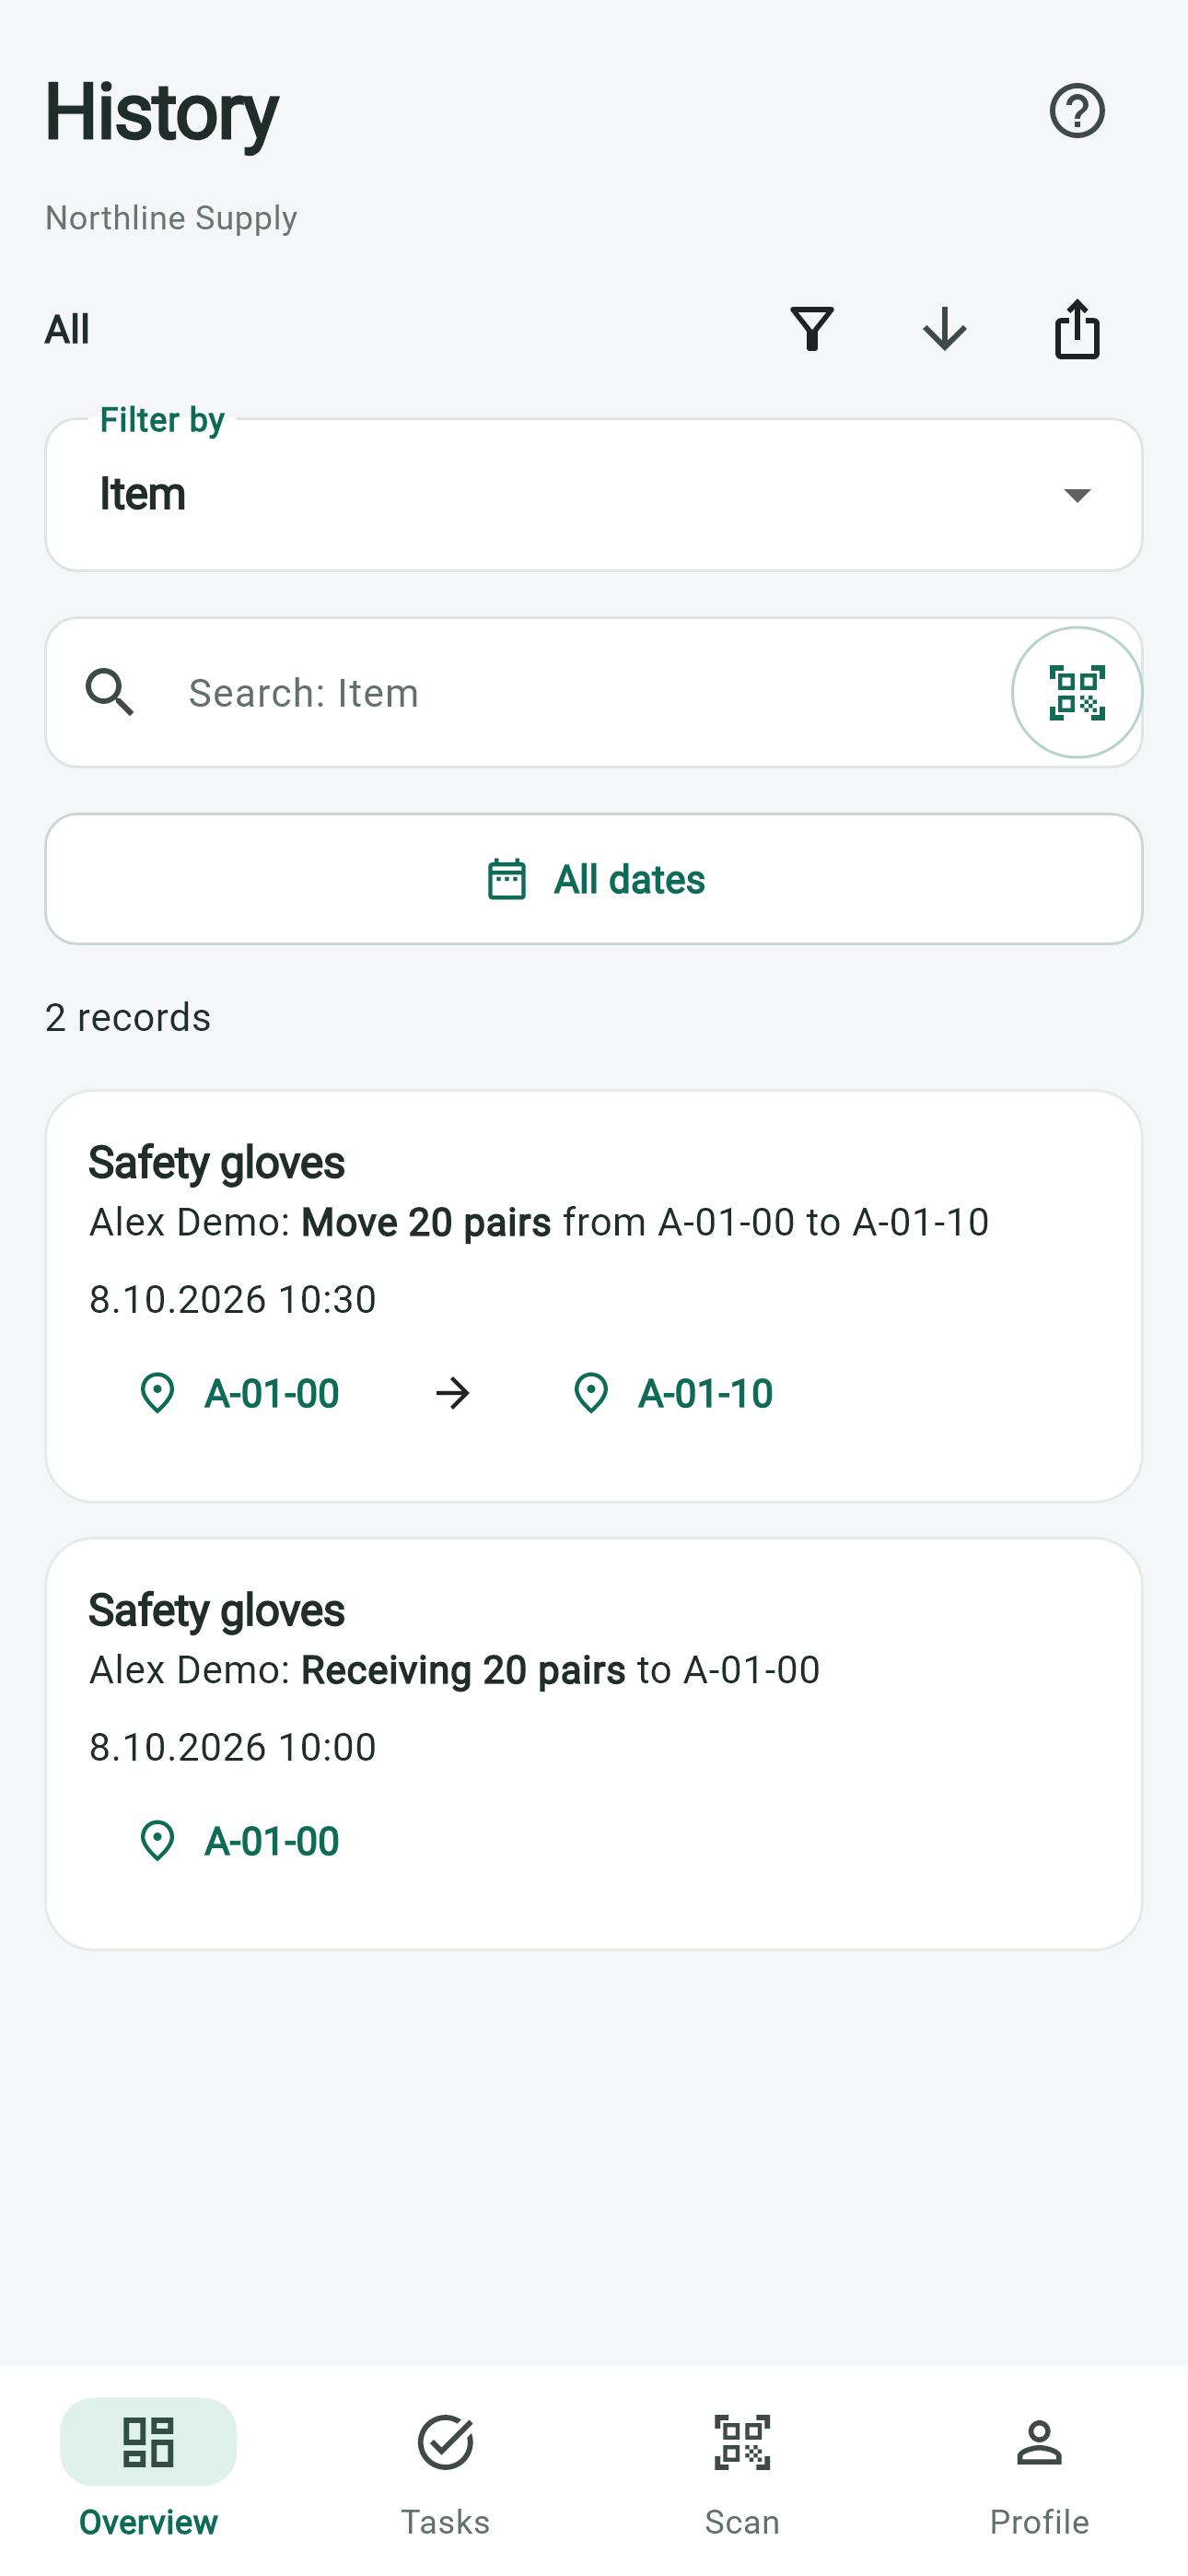
Trace a movement
Use the item or movement history to check what changed and when.